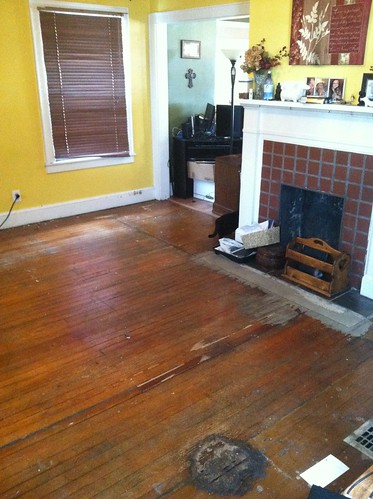
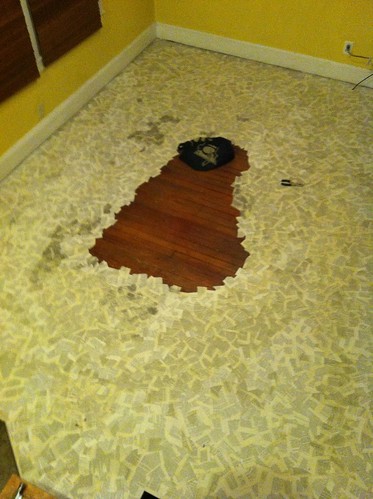
Two rounds of puppy housebreaking and crate training later, our carpet was completely ruined. Which is why, last summer, we decided to pull the carpet up and take our chances with the hardwood underneath. So the living room, stairs, and upstairs hall were de-carpeted. What we found was, well, disappointing. The wood was structurally sound, but cosmetically trashed. Scorch marks, large paint smears, and even concrete/plaster covered various sections of the floor. It became clear that we were going to have to do something. New carpet would just get ruined, and refinishing the hardwood would be a little too costly. So, I decided to investigate different do-it-yourself strategies.
I stumbled upon a web article that talked about using brown paper bags to cover a floor. You glue pieces of bags down, and cover with several coats of varnish. While the brown paper looked nice, I was struck by a moment of inspiration. As a book reviewer, I get a ton of Advanced Reader Copies of books. These are uncorrected proofs that cannot be resold or donated. And it seems like such a waste to just throw them away. So, I thought, why not use them to cover my floor and decorate my home? I got busy making a board on pinterest, but waited a while to pitch the idea to Hubby. When I finally did, he was a bit skeptical, understandably so. What I was proposing was unlike anything we had ever seen before. So we waited, and waited, and waited. I even bought stuff to do a test patch, but we never did it.
Finally, on New Year's Day of this year, we bit the bullet and did a test patch. And we loved it! So, I immediately got to work.
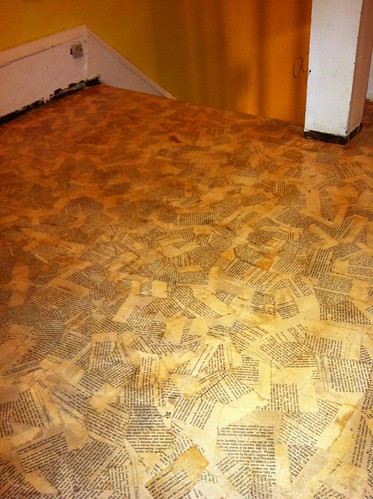
The first step was to take the books were were using, remove them from their bindings, and tear the pages into pieces. We opted to go with old books, because the typefaces used in them would give the floor the vintage feel we were looking for. Then I could use all those Advanced Reader Copies in decorations. Once we had all the pages torn up, we used a 1:1 mixture of glue (just regular old white school glue) and water to make a thin paste. We brushed a layer of paste on a small section of floor, then began overlaying pieces of book page on the floor, covering with another later of paste.
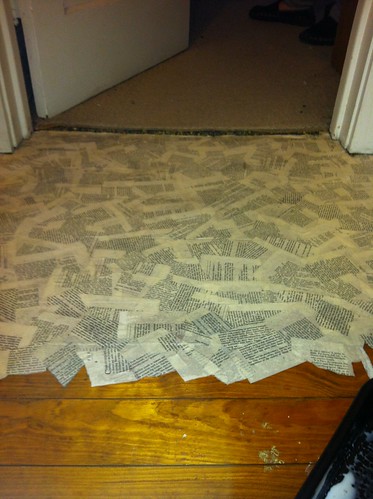
We slowly did this until the entire floor was covered. We allowed this to dry for a day. Then we covered with a layer of a polyurethane that had varnish mixed in. This gave the paper a slight tint. We allowed this to dry for a day, then did a second coat. Another day of drying was followed by a third coat. The result was amazing; it looked almost antiqued.
We did the upstairs hall first, then every other step on the staircase, then the remaining steps, and finally the living room floor.
Each different section presented it's own set of difficulties, and at one point the cat ended up in the duct work. But finally after about 5 weeks, the floor was completely finished.
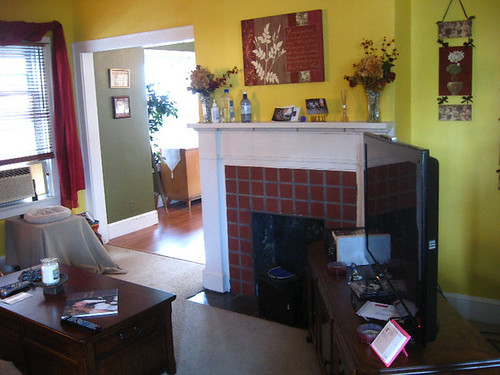
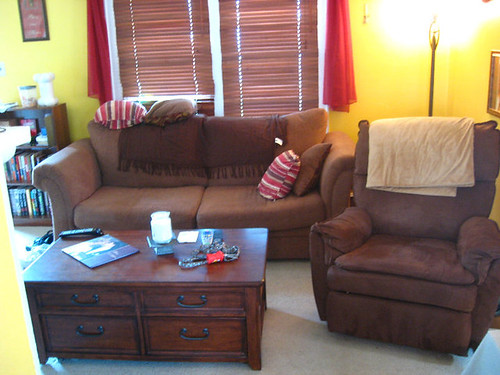
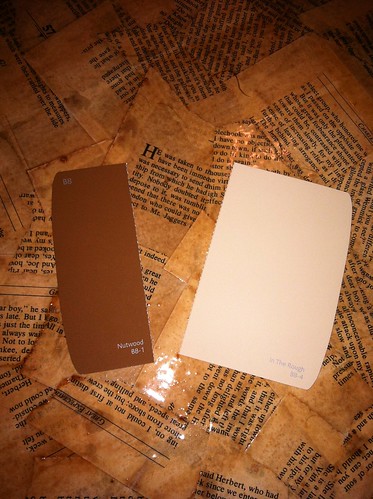
Since we had to move all the furniture out of the living room to work on the floor, I suggested we go ahead and paint as well. We selected paint colors, and purchased all the accouterments. Another 3 weeks were devoted to painting the walls, ceiling, and trim.
So, how did it all turn out? Stay tuned!