Showing posts with label Arts and Crafts. Show all posts

Wednesday, November 27, 2013

Literary Christmas Tree

What accomplishment are you most proud of?

I have been wanting to write about this for a while now!  After the tremendous success of our book page floor, I decided I wanted to undertake another bookish project.  Because I am a book reviewer, I get a lot of Advanced Reader Copies, or ARCs, of books.  These are, essentially, proof copies.  The usually do not having finished cover art, and they cannot be donated or sold.  Basically, they are intended to be trashed.  Because I get so many of these for reviewing purposes, they build up quickly, and I hate to just waste them.  So, I decided I was going to use them to make Christmas decorations.

Detail of tree- Steve's name tag

In August, I started thinking of ways to make decorations.  I covered some styrofoam balls with scraps of book pages.  I cut some pages into lines and used them to fill clear glass and plastic bulbs.  I used book pages to decoupage paper mache and wooden forms.  I shredded book pages and used in floral and burlap arrangements.  I made Victorian style floral cones from book pages.  And I used an entire book's worth of pages to make a tree skirt.  I even made book page chain garland.

Detail of Tree- Victorian floral

The results were more stunning than I ever hoped for.  I am completely in love with our literary Christmas Tree.


Full shot of tree

Because this was not your traditional Christmas tree, I decided to put it up early.  It has been up for about a week and a half.  The entire thing took about 3 books, again, one of those was entirely used on the tree skirt.  To make the skirt, I cut out 2200 circles of various sizes from the pages.  I hot glued them in overlapping rows on a cotton batting tree skirt.  It took about 7 hours to make the tree skirt.

Often I would work on these decorations while Hubby and I watched television, so I was able to put in a lot of hours without noticing it.  Over the course of 3.5 months, I made probably close to 100 ornaments, the chain, and the tree skirt.  I used burlap to make small bows for the tree, and the large bow for the tree topper.

Such an unusual tree needs something unusual underneath.  Vintage books, a vintage typewriter, a file drawer and card catalog drawer were just the thing.

Vintage typewriter and books

I am incredibly proud of this tree.  I think it turned out so lovely, I am not sure I will ever want to take it down.  You can see the full set of pictures of the tree here.

NaBloPoMo November

Wednesday, May 1, 2013

35 Day Project: Secret Revealed

Do you remember way back near the beginning of the project, I told you that I performed an act that remained a secret?  Well now I get to spill the beans!!

One of my fellow Pittsburgh bloggers told me about this awesome group on Facebook called the Art Ambush Project.  This group consists of a collection of artists who strive to make the world a better place through the gift of art.  The way the project works is people like you and me nominate others to receive a gift of art.  The nomination process includes telling a little about the nominee, their story, their sorrows, their joys, and talking about why you think they deserve this gift.  If the nomination is accepted, it gets assigned to an artist in the group, and then the artist has the freedom to create the perfect gift.

I chose to nominate my brother and his partner.  They are two of the most incredible people I know.  While they are quite different from each other in personality and style, they complement each other and create a perfect team.  Nearly two years ago now, my brother Dennis became a nurse practitioner, and Paul is an artist.  They recently bought a house as well.  I wanted to show them how proud I am, not only for all their accomplishments, but simply for who they are as people.  So, this nomination was my way of showing my love and admiration.

When I contacted the group, a funny thing happened.  I began talking to one of the founders, Lisa.  When I explained in depth who the nomination was for, she shared with me that she was familiar with Paul as an artist, because they live in the same state.  She said being asked to create work for him was like telling someone to send their crayon drawing to Picasso.  I thought that was such a cool "what a small world" moment!

Lisa kept me updated on the process, and the beautiful work she and her mom were creating.  Finally, the big day arrived, and the package was delivered.  It included a beautiful mosaic created by Lisa.  It was a yin yang, the perfect symbol for Dennis and Paul.  Lisa's mother also made them some beautiful soaps in the shape of yin yang.  The guys absolutely loved their art ambush!

895385_10151317505426863_906637024_o
Photo courtesy of Paul Richmond
This was an amazing experience.  This group is doing something spectacular.  I really encourage you to check them out, and consider nominated someone for the gift of art!

Monday, March 4, 2013

Home Improvements: Living Room After

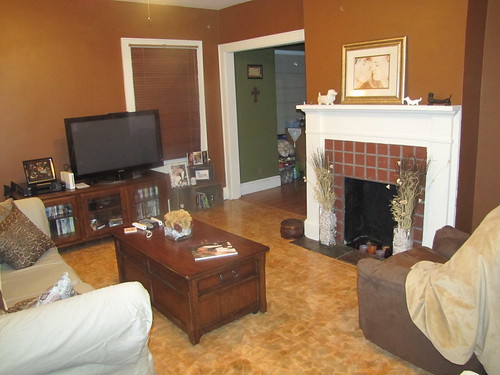
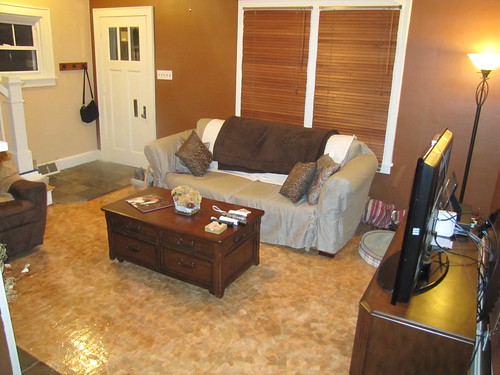
After two months of hard work, hours of time spent on the floor and new paint, weeks of eating our dinner at the kitchen sink because all of our living room furniture was crammed into our dining room, we finally finished our living room last weekend.  We finished touching up the paint, moved the furniture back in, and we are finally enjoying the fruits of our labor.

I present to you our completely redone living room.


IMG_6760

IMG_6771

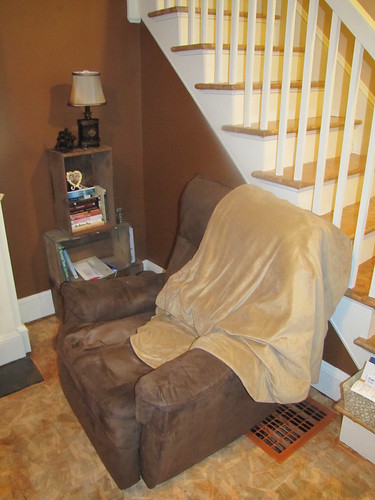
What do you think?  I adore it.  There are lots of little details, including the vintage crates we found in the basement that we are now using as mini bookcases.  We even have a cozy little reading nook.

IMG_6756

There are a ton more pictures in a flickr set you can view here.

The first night after the room was finished, as we were sitting down to dinner, Hubby glanced into the living room and whispered "Our house is awesome."  In that moment, the past two months totally became worth it.


Saturday, March 2, 2013

Home Improvements: Living Room Before and During

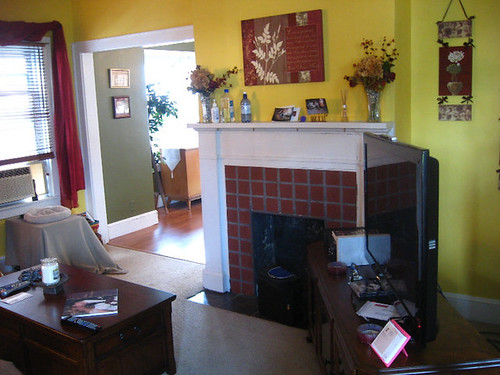
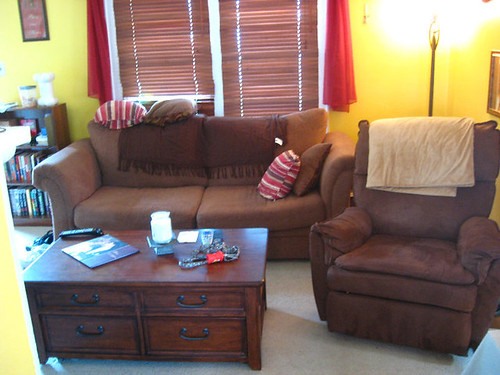
When Hubby and I bought our house 3 1/2 years ago, it was pretty much move in ready, which is exactly what we needed.  We were in a time crunch, due to my apartment's lease running out.  So, we closed on the house the end of July, and moved in the very next weekend.  And then our wedding was in October.  As a result, we did not have time to do much with the house.  No painting, no major changes in decor, nothing.  Therefore, we had to make the best of it, which we did.  The living room was a soft yellow color, with cream carpeting.  We bought some neutral furniture, and made the best of it.

36831_421099619059_7601880_n

Living room- before

Two rounds of puppy housebreaking and crate training later, our carpet was completely ruined.  Which is why, last summer, we decided to pull the carpet up and take our chances with the hardwood underneath.  So the living room, stairs, and upstairs hall were de-carpeted.  What we found was, well, disappointing.  The wood was structurally sound, but cosmetically trashed.  Scorch marks, large paint smears, and even concrete/plaster covered various sections of the floor.  It became clear that we were going to have to do something.  New carpet would just get ruined, and refinishing the hardwood would be a little too costly.  So, I decided to investigate different do-it-yourself strategies.
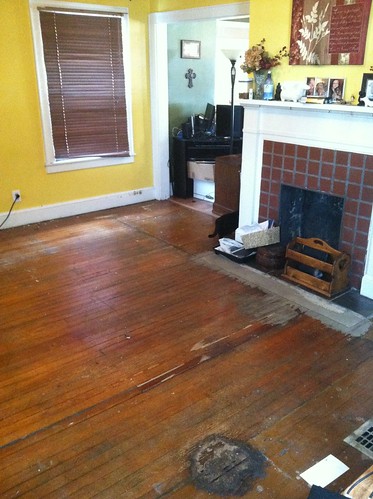
The floor in the living room when we started

I stumbled upon a web article that talked about using brown paper bags to cover a floor.  You glue pieces of bags down, and cover with several coats of varnish. While the brown paper looked nice, I was struck by a moment of inspiration.  As a book reviewer, I get a ton of Advanced Reader Copies of books.  These are uncorrected proofs that cannot be resold or donated.  And it seems like such a waste to just throw them away.  So, I thought, why not use them to cover my floor and decorate my home?  I got busy making a board on pinterest, but waited a while to pitch the idea to Hubby.  When I finally did, he was a bit skeptical, understandably so.  What I was proposing was unlike anything we had ever seen before.  So we waited, and waited, and waited.  I even bought stuff to do a test patch, but we never did it.

Finally, on New Year's Day of this year, we bit the bullet and did a test patch.  And we loved it!  So, I immediately got to work.  

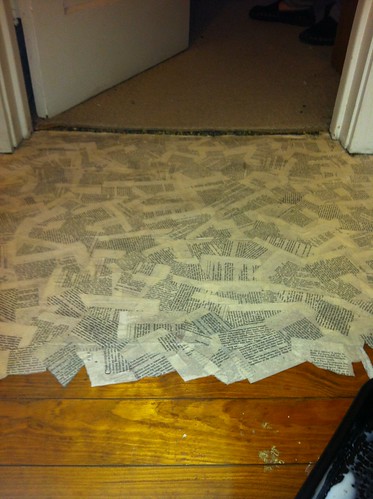
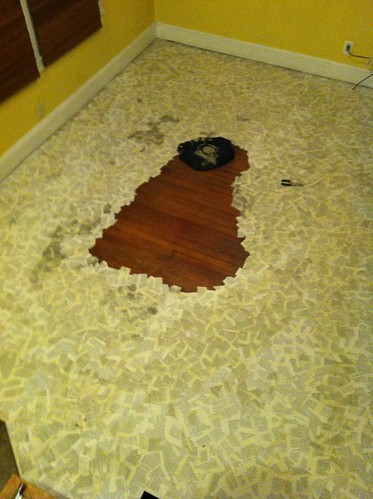
The first step was to take the books were were using, remove them from their bindings, and tear the pages into pieces.  We opted to go with old books, because the typefaces used in them would give the floor the vintage feel we were looking for.  Then I could use all those Advanced Reader Copies in decorations.  Once we had all the pages torn up, we used a 1:1 mixture of glue (just regular old white school glue) and water to make a thin paste.  We brushed a layer of paste on a small section of floor, then began overlaying pieces of book page on the floor, covering with another later of paste.

Upstairs hall in progress

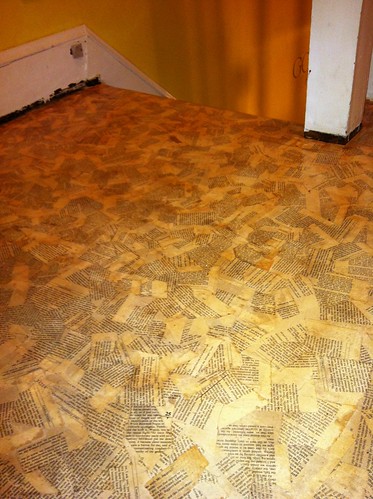
 We slowly did this until the entire floor was covered.  We allowed this to dry for a day.  Then we covered with a layer of a polyurethane that had varnish mixed in.  This gave the paper a slight tint.  We allowed this to dry for a day, then did a second coat.  Another day of drying was followed by a third coat.  The result was amazing; it looked almost antiqued.

Third coat of varnish

We did the upstairs hall first, then every other step on the staircase, then the remaining steps, and finally the living room floor.
Nearly covered

Each different section presented it's own set of difficulties, and at one point the cat ended up in the duct work.  But finally after about 5 weeks, the floor was completely finished.

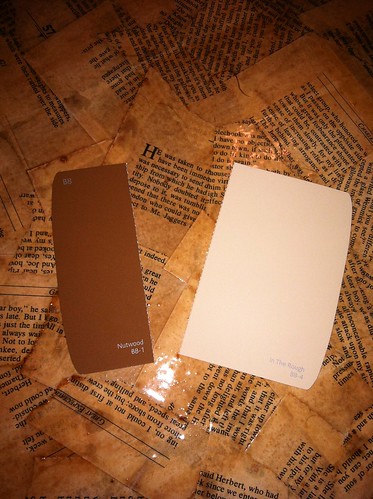
Since we had to move all the furniture out of the living room to work on the floor, I suggested we go ahead and paint as well.  We selected paint colors, and purchased all the accouterments.  Another 3 weeks were devoted to painting the walls, ceiling, and trim.

Paint color chips against the floor

So, how did it all turn out?  Stay tuned!

To see more pictures of the floor in progress, view my entire flickr set here


Tuesday, February 26, 2013

In the Big City: Before I Die

I am a pretty big fan of public art displays.  The Pittsburgh Dinosaurs.  The Erie Frogs. The Garret County Bear Trail.  The Punxy Groundhogs. I love seeing art out in the real world.  But when a public art display is also interactive, meaning I can be a part of the art, well, that just about makes my day.

What do you want to do

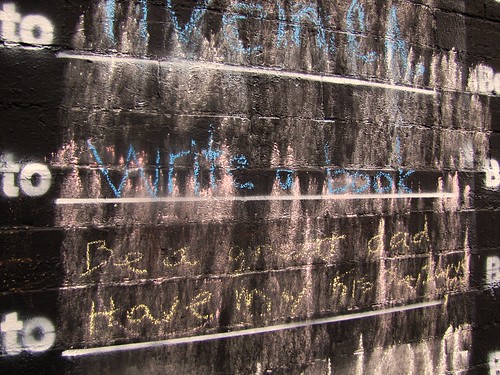
On Sunday, Hubby and I had an impromptu day date in Pittsburgh.  We went to explore a couple of specific businesses, and ended up driving around and exploring parts of the city as well.  It was something I used to do a lot when I was single, and we did together a few times when we were dating.  While we were driving around, we stumbled into Allegheny Center, and drove past a remarkable building.  It had large squares of chalkboard paint on different spots of the building, and there were sentences written on it.  Each sentence began with the words "Before I die, I want to__________________".  The blanks were filled in on many of the sentences.  We drove by it, and I was so struck by it, visually, that I decided to drive back around Allegheny Center so I could stop and take pictures.

Before I die, I want to

When we got back to the spot, I got out of the car, and started snapping shots.  Some of them are a little hard to read, since it was obvious the chalkboards had been written on many many times.  The remnants of old wishes mingling with new wishes.  Many of the wishes were poignant, many were sweet, many were heartbreaking, and a few were just fun.  I searched and searched until I found a tiny remnant of blue chalk and wrote a wish of my own.  Before I die, I want to write a book.

Write a book

I have never been a huge fan of the whole bucket list concept.  I am not sure why, but to me it just seems sad.  I would rather live in the moment.  But this public art project took the whole concept of a bucket list and made it into something I found inspiring and incredibly moving.  If you live in the Pittsburgh area, I really encourage you to do some explorations and find this building.  If you live somewhere else, go exploring.  And do a little reflecting about what you want to accomplish during your time on Earth.

Let go, Be free, Be alive

See all the photos I took here.  Also see a video about the project here.

Friday, November 9, 2012

Thankful for... creative reuse

IMG_6481

I am not the most creative person out there, but I certainly have my moments.  I am still proud of the fact that I made the flowers, invitations, favors, and programs for our wedding, to help keep the budget down.  And I am a highly creative cook.  But in most other ways, I am not a creative person.  I tend to see things exactly as they are, as opposed to what they could be.

The world is full of highly creative people, who can take something that seems useless and transform it into something beautiful or highly functional.  I really value people like that, and am often awestruck by the things they create.  Last night, I got to meet some really creative people, and spend time in a highly creative environment.  I am hoping some of it rubbed off on me. 

IMG_6475

A group of my social media pals created the idea of a Blog Mob, where are group of bloggers comes together, learns about a new organization, and goes out to spread the word.  Last night we attended a Blog Mob hosted by the Pittsburgh Center for Creative Reuse (PCCR)  and Construction Junction.  Let me tell you, it was pretty darn inspiring.  Both of these organizations foster the idea of reusing materials that might otherwise be wasted, and putting them to use in creative ways.

PCCR is a large shop where individuals can go to purchase items at low cost.  Most of these items are art or craft related, but the things you will find in the shop are amazing, and the possibilities for their use are pretty much endless.  This is a wonderful resource for artists, crafters, teachers, scout troops, and anyone who likes to do creative projects.  The items are reasonably priced, and the idea that you are reusing something that would have otherwise been wasted is priceless.  PCCR also hosts programs and classes where you can learn to make projects and allow your creativity to flourish.

IMG_6480


Housed in the same building as PCCR is Construction Junction, an organization which focuses on the reuse of building and home materials.  Reuse purposes can be as simple as using an item in its original function in your own home, or as wild as transforming it into a completely new item with a new purpose, like turning a bathtub into a sofa.

IMG_6502

The idea behind PCCR and Construction Junction is that instead of people throwing away perfectly good items and materials, they donate them to these groups, thereby allowing others to purchase them at a low cost and prevent waste.  The programs are very green in nature, and are community focused.  I found both organizations to be really unique, and the people from the organizations are incredibly kind.  Often, being creative has been a little cost prohibitive for me, but with these organizations the costs are pretty affordable.  As I toured both facilities last night with the Blog Mob, I was inspired to make ALL THE THINGS.  And that says a lot.

As a part of our time there we had a chance to work on a project.  The idea was we could take items from the PCCR shop to make a Christmas tree decoration, and the decorated tree will later be donated to a shelter.  (Did I mention I am not very creative?).  I really tried to let the items in the shop inspire me, and I think I did a decent job.  One of the items they had was a collection of slides donated by a college who had recently digitized their collection.

These slides spoke to me
 
I noticed many of the slides had green labels, so I fashioned them into a Christmas Tree, and decorated it with odds and ends of other materials.  Not too shabby.

My Slide Christmas Tree

I am really thankful for the opportunity to explore both of these incredible organizations, and I highly recommend to any creative types out there (I am talking to you Pinterest folks!!!), take some time to explore and support both these great organizations.  They are supporting creative folks, and supporting the gentle treatment of the environment.  I call that a win- win.

For more information on both these organizations, visit their sites, and look for them on Twitter and Facebook.  More photos from the Blog Mob can be seen in my Flickr set here.


typewriter

Thursday, May 3, 2012

In the Big City: Toonseum

I have a whole backlog of topics I have been wanting to write about and just had not gotten around to it, so today I am digging out one of those topics.

As readers know, Hubby and I are always looking for fun things to do in Pittsburgh, since it is only an hour away.  A few months ago, Groupon offered a deal on admission to the Toonseum, and Hubby and I jumped at the opportunity.  We finally went this winter.

111


The Toonseum is a museum completed dedicated to cartooning, one of only 3 in the country!  One may not realize what an art form cartooning is, but the Toonseum will help to teach this fact.  The first thing I noticed was the place was awash in color and fun.  No stuffy quiet dusty exhibits here.  A lot of iconic cartoon characters and artists are featured throughout the museum, and one room is nothing but prints of Sunday comic strips from the same day, which was probably my favorite part.

090

104


101


We had a complete blast, and Hubby even got to sit at a read cartoonists table and draw a picture.
110

As some of you may recall, Hubby likes to draw cartoons every so often.

Pittsburgh is chock full of fun, cultural places to visit and things to do. And we love doing these things. But we also like to act like kids now and then, which is why the Toonseum was a perfect place for us to visit. I really encourage all in the Pittsburgh area to visit Tooneseum, at least once, but be careful of the falling anvils!

089


Monday, February 27, 2012

"Pin"satiable


I first took notice of Pinterest a few months ago, when I noticed that quite a few people were reaching my blog from that site.  I knew a few people who had joined, but, as with Twitter and the iPhone, I thought it sounded like a complete time suck and avoided it like the plague.

Then, I was at a party where some of my friends were discussing it, and decided it might be worth a try.  I requested an invitation, and within a week or so, I was granted access to set up my account.

For those of you who do not know, (first off, how do you not know), Pinterest is a site where you create virtual pin or vision boards.  When you first set up your account, they have some preset suggested boards, like "For the Home", and "Recipes" but you can delete or rename these.  In addition, you can create boards with any theme you want.  For example, I have a board for general crafty or DIY stuff, but then I have specific boards set up as inspiration for redecorating our living room and spare room.

I absolutely love this site, and the iPhone app.  I have gotten so many great ideas from here.  Hubby was annoyed at first, until I made several recipes I found on Pinterest.  Now he is a big fan as well.  I not only re-pin things I find on there or the web, but I have pinned a lot of my own original content as well, including entries from my blogs.  My most popular pins are some of Hubby's cartoons.

If any of you are interested in Pinterest, I do have available invitations, so find me on Facebook or Twitter and let me know you would like one.  If you are already on Pinterest, be sure to follow me and my boards by clicking the button in my sidebar.

Happy Pinning Ya'll!

Saturday, May 21, 2011

National Photography Month

IMG_5464


I recently learned that May is National Photography Month, and there was no way I was going to let this month go by without talking about it!  In the past two years, photography has become a big hobby of mine.  I am still incredibly amateur, and get really frustrated when I cannot capture things the way I like.  I know nothing about polarizing filters, cannot take an extreme macro shot unless it is pure luck, and lament the fact that a thousand dollar camera is way, way, WAY out of my price range.  I doubt I will ever try to be a professional photographer, for one thing, I am not a big portrait taker, and that is what most people want.  I am much better at outdoorsy, nature, or artsy photos.

I have taken one photography class, just an adult ed class, and would love to take some actual college classes, but if I never do, I am ok with that too.  Photography is something I get to spend a little "me" time on every day.  And I have made vast improvements.  For example, most of my photographs that I took 2 years ago were either this

130

or this

107

My skills were limited to turning the camera around to take pictures of myself (which I admit, I still do sometimes), or taking a boring center weighted picture that showed little to no detail.

These days, I still take self portraits, but I have learned to use a tripod and self timer, and to play with settings and editing, to come up with things like this

Titian


I have learned to frame things in interesting or unusual ways, like this
Filtering Through on 365 Project

I have learned to take tight shots full of detail, like this
IMG_6493

And I have learned to "see" things in whole new ways, like this
Stained Glass Windows on 365 Project

Am I ever going to achieve fame or wealth as a result of the pictures I take?  Probably not.  But I have achieved a new found appreciation for the world around me.  A newfound love of nature.  An ability to see all the little pictures that happen every single day.  An increased attention to the small things in life.  And a supreme thankfulness for God's glorious creations, and the blessings He has bestowed upon me.

So, I am glad that I have stumbled upon this little hobby, whether it ever becomes more than that or not.

Monday, May 2, 2011

April Showers

Favor

While I was getting pretty sick of all the rain we had last month, there was one shower with which I was positively enthralled- and that would be my friend Erin's bridal shower, which was held Saturday, April 30th.

Erin has contributed to the weddings and showers of so many of her friends, I was so excited to see what they would do for hers.  Nothing about the shower was revealed beforehand other than the theme being Paris (that is where they got engaged).  So, all of it was a surprise for Erin, and I have to tell you, her bridesmaids and family did a fantastic job making sure Erin had a beautiful day.

Welcome Sign


The place was decked out in lots of purple and pink, color of the wedding.
Tables


 And Eiffel Towers could be found everywhere.
Eiffel Towers on each table


 Personalized candies were on the tables.
4-30-11


And the breakfast food was delicious.
Breakfast was delicious!


But my absolute favorite was the Eiffel Tower of cupcakes.
Cupcakes

One of the bridesmaids made all the yummy cupcakes, while another one of the bridesmaids' boyfriend made the actual Eiffel Tower.
Eiffel Tower cupcake holder

So many talented people helped make Erin's day so special.

Erin got so many wonderful gifts at her shower, it was exciting to watch her open them.


 And of course, her fiance' showed up to bring his love some lovely flowers.
Jason arrives


 It just makes me indescribably happy to see my friends so in love.
Jason looks so happy


Since I knew Erin's shower had a Parisian theme, I wanted to give her a Parisian themed gift as well. I got her several different Paris knick knacks, as well as some coffee and beignet mix rom Cafe du Monde. I decided to make a custom hat box to wrap it all in. So I used different Paris themed pictures, various scrapbook papers and doo dads, and this is how it turned out.
I am so proud how it turned out!


detail


Box lid


Ribbon on my gift to Erin

The day was a smashing success, and I really just feel very blessed to call Erin and Jason my friends, and am honored to be a part of this wonderful time in their lives.

Congratulations Erin and Jason, we love you very much!