Thursday, March 7, 2013

It Made My Day: After All These Years

Hubby has made a pastime out of teasing me.  He knows exactly what to do to get me riled up, knows exactly what buttons to push.  It always ends up being something we laugh about, he is never malicious in his teasing.  But sometimes, he teases me about things that can be a little, well, personal.  Like he will tell me how much he likes my butt in a pair of jeans.  Or he will tell me how sexy I look wearing one of his old t-shirts.  And, like a young school girl, I inevitably blush.

Yesterday, he, in great detail, told me how much he liked the way a particular pair of pants looked on me.  It got me so flustered, I turned red, and tried to exit the room.  As I was almost out the door, he grabbed my hand and pulled me back, putting his arms around me and saying "I love the fact that after all these years, I can still make you so flustered."

He paused a moment, and then said "And I love the fact that we have been together so long that I can properly use the phrase 'after all these years'."

015
This was taken within the first two months we were dating, we look so young!


It was like a line from a movie, and it totally made me melt.

But beyond that, it made my day.

Tuesday, March 5, 2013

In The Big City: East End Book Exchange

Anyone who knows me at least a tiny bit knows I love books, and I never met a bookstore I did not like.  Which is exactly why I was super excited to learn a few weeks ago that I had won a $25 dollar gift certificate to the East End Book Exchange, courtesy of IHeartPgh.  Not only was I going to get some more books (like I really need more), I was also going to get a chance to visit a new used book store and support small local business.  That is a win all the way around!

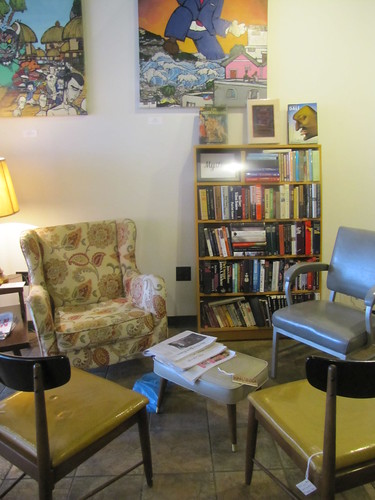
IMG_6723

First thing first, let me tell you how excited I was that the book exchange had Sunday hours, a rarity with used bookstores.  I knew Hubby would want to visit with me, and weekends are our only option.  We were finishing up the paint in the living room the weekend of our visit, so Saturday was out.  It was exciting that we got to have a Sunday morning afternoon date in the city (we visited a few other places while we were there and even got to have brunch!).

If I could sum up the vibe of the East End Book Exchange in one word, it would be "swoon".  I loved everything about the store, and could easily see myself spending an entire afternoon there.  It has a very cozy vibe, with several little reading areas set up.  It would be a perfect place to tuck yourself away on a cold day 
with a great book.  


IMG_6722

There was even an area for kids, and I think it would be so cool to host a story hour there!

The book selection had a lot of variety, and the prices were very reasonable.  I took the opportunity to get books I would have never selected for myself normally.  It never hurts to expand one's literary repertoire.  There is a section of rare books, and I found that incredibly fascinating.  I could have spent hours poring through just that section alone!

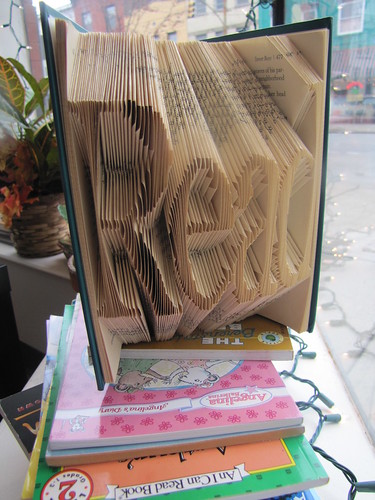
The store is brightly decorated with artwork, which is a cheerful addition.  They are also going to be continuously adding more cool vintage furniture from a local dealer.  Probably one of my favorite aspects of the decor were these gorgeous book sculptures displayed in the front windows, made by a local artist.  I was seriously drooling, I wanted one so badly!
   
IMG_6721

Awesome little finds like the East End Book Exchange really make me miss living in Pittsburgh, and make me all the more determined to spend more time in the city.  After all, it is not that far really.  One thing is certain, however; the East End Book Exchange is now on my list of "must visit" places in Pittsburgh.  As in I "must visit" it each time I am in the city.  And you should too.

Check out the rest of my pictures of the East End Book Exchange here.

Disclaimer: I am not in any way affiliated with the East End Book Exchange, nor was I asked to write this post.  I simply wanted to share a great Pittsburgh find with my readers!

Monday, March 4, 2013

Home Improvements: Living Room After

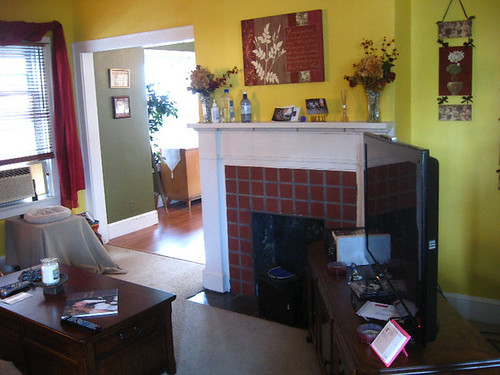
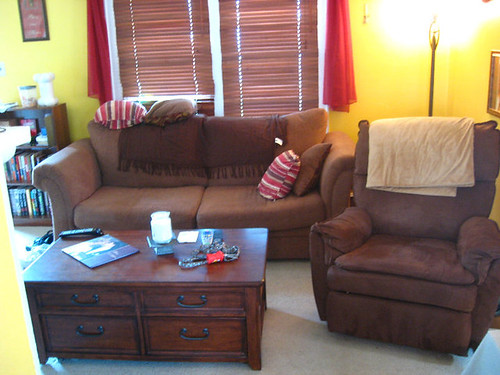
After two months of hard work, hours of time spent on the floor and new paint, weeks of eating our dinner at the kitchen sink because all of our living room furniture was crammed into our dining room, we finally finished our living room last weekend.  We finished touching up the paint, moved the furniture back in, and we are finally enjoying the fruits of our labor.

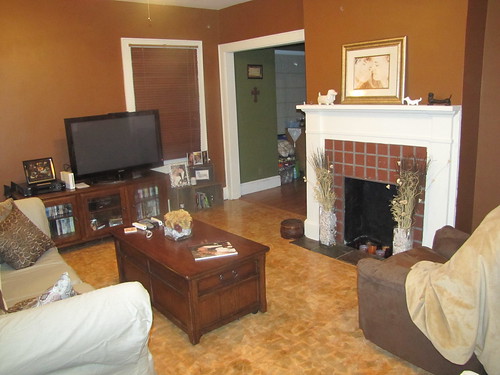
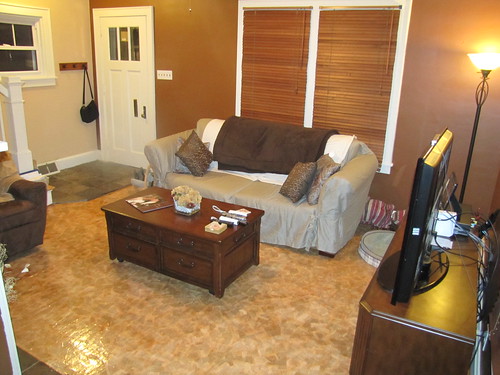
I present to you our completely redone living room.


IMG_6760

IMG_6771

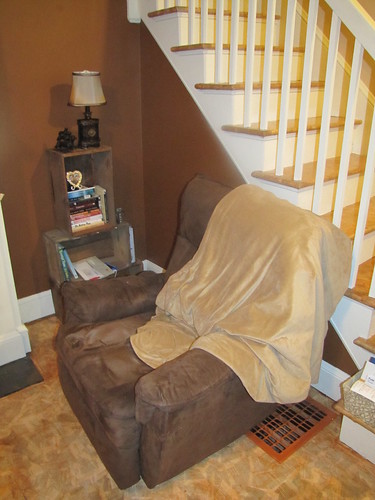
What do you think?  I adore it.  There are lots of little details, including the vintage crates we found in the basement that we are now using as mini bookcases.  We even have a cozy little reading nook.

IMG_6756

There are a ton more pictures in a flickr set you can view here.

The first night after the room was finished, as we were sitting down to dinner, Hubby glanced into the living room and whispered "Our house is awesome."  In that moment, the past two months totally became worth it.


Saturday, March 2, 2013

Home Improvements: Living Room Before and During

When Hubby and I bought our house 3 1/2 years ago, it was pretty much move in ready, which is exactly what we needed.  We were in a time crunch, due to my apartment's lease running out.  So, we closed on the house the end of July, and moved in the very next weekend.  And then our wedding was in October.  As a result, we did not have time to do much with the house.  No painting, no major changes in decor, nothing.  Therefore, we had to make the best of it, which we did.  The living room was a soft yellow color, with cream carpeting.  We bought some neutral furniture, and made the best of it.

36831_421099619059_7601880_n

Living room- before

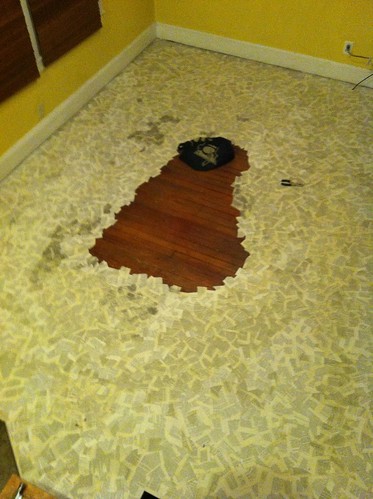
Two rounds of puppy housebreaking and crate training later, our carpet was completely ruined.  Which is why, last summer, we decided to pull the carpet up and take our chances with the hardwood underneath.  So the living room, stairs, and upstairs hall were de-carpeted.  What we found was, well, disappointing.  The wood was structurally sound, but cosmetically trashed.  Scorch marks, large paint smears, and even concrete/plaster covered various sections of the floor.  It became clear that we were going to have to do something.  New carpet would just get ruined, and refinishing the hardwood would be a little too costly.  So, I decided to investigate different do-it-yourself strategies.
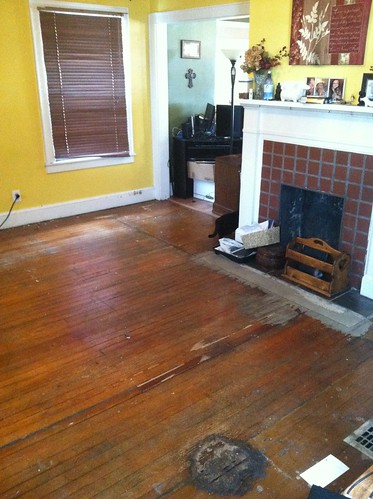
The floor in the living room when we started

I stumbled upon a web article that talked about using brown paper bags to cover a floor.  You glue pieces of bags down, and cover with several coats of varnish. While the brown paper looked nice, I was struck by a moment of inspiration.  As a book reviewer, I get a ton of Advanced Reader Copies of books.  These are uncorrected proofs that cannot be resold or donated.  And it seems like such a waste to just throw them away.  So, I thought, why not use them to cover my floor and decorate my home?  I got busy making a board on pinterest, but waited a while to pitch the idea to Hubby.  When I finally did, he was a bit skeptical, understandably so.  What I was proposing was unlike anything we had ever seen before.  So we waited, and waited, and waited.  I even bought stuff to do a test patch, but we never did it.

Finally, on New Year's Day of this year, we bit the bullet and did a test patch.  And we loved it!  So, I immediately got to work.  

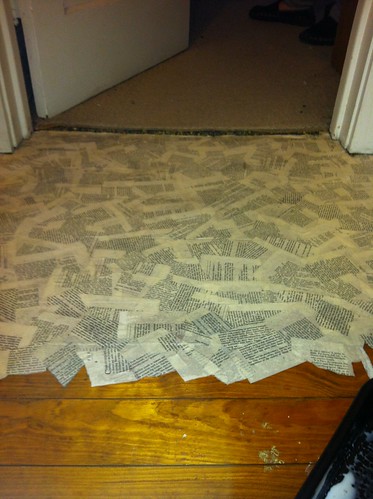
The first step was to take the books were were using, remove them from their bindings, and tear the pages into pieces.  We opted to go with old books, because the typefaces used in them would give the floor the vintage feel we were looking for.  Then I could use all those Advanced Reader Copies in decorations.  Once we had all the pages torn up, we used a 1:1 mixture of glue (just regular old white school glue) and water to make a thin paste.  We brushed a layer of paste on a small section of floor, then began overlaying pieces of book page on the floor, covering with another later of paste.

Upstairs hall in progress

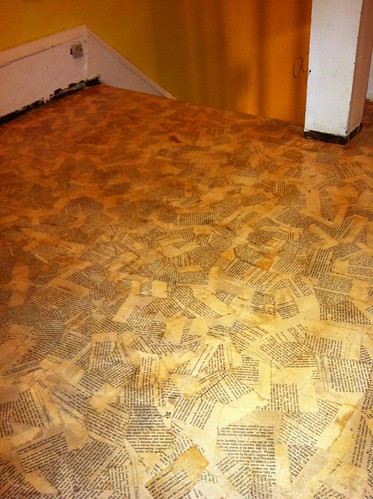
 We slowly did this until the entire floor was covered.  We allowed this to dry for a day.  Then we covered with a layer of a polyurethane that had varnish mixed in.  This gave the paper a slight tint.  We allowed this to dry for a day, then did a second coat.  Another day of drying was followed by a third coat.  The result was amazing; it looked almost antiqued.

Third coat of varnish

We did the upstairs hall first, then every other step on the staircase, then the remaining steps, and finally the living room floor.
Nearly covered

Each different section presented it's own set of difficulties, and at one point the cat ended up in the duct work.  But finally after about 5 weeks, the floor was completely finished.

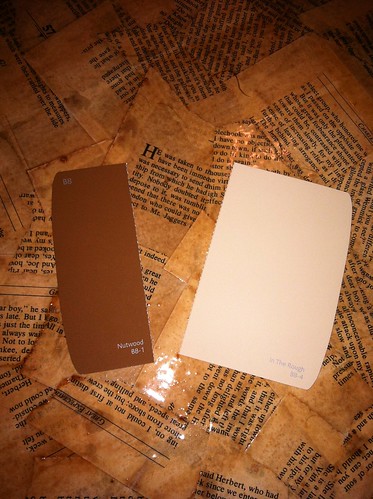
Since we had to move all the furniture out of the living room to work on the floor, I suggested we go ahead and paint as well.  We selected paint colors, and purchased all the accouterments.  Another 3 weeks were devoted to painting the walls, ceiling, and trim.

Paint color chips against the floor

So, how did it all turn out?  Stay tuned!

To see more pictures of the floor in progress, view my entire flickr set here

   

Tuesday, February 26, 2013

In the Big City: Before I Die

I am a pretty big fan of public art displays.  The Pittsburgh Dinosaurs.  The Erie Frogs. The Garret County Bear Trail.  The Punxy Groundhogs. I love seeing art out in the real world.  But when a public art display is also interactive, meaning I can be a part of the art, well, that just about makes my day.

What do you want to do

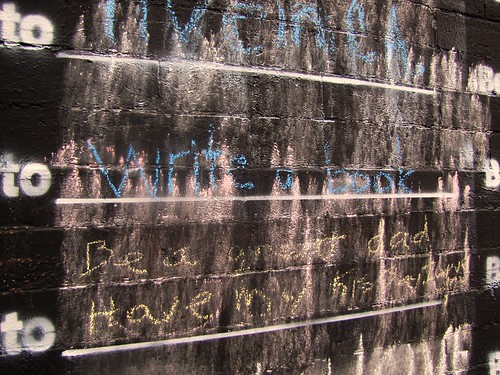
On Sunday, Hubby and I had an impromptu day date in Pittsburgh.  We went to explore a couple of specific businesses, and ended up driving around and exploring parts of the city as well.  It was something I used to do a lot when I was single, and we did together a few times when we were dating.  While we were driving around, we stumbled into Allegheny Center, and drove past a remarkable building.  It had large squares of chalkboard paint on different spots of the building, and there were sentences written on it.  Each sentence began with the words "Before I die, I want to__________________".  The blanks were filled in on many of the sentences.  We drove by it, and I was so struck by it, visually, that I decided to drive back around Allegheny Center so I could stop and take pictures.

Before I die, I want to

When we got back to the spot, I got out of the car, and started snapping shots.  Some of them are a little hard to read, since it was obvious the chalkboards had been written on many many times.  The remnants of old wishes mingling with new wishes.  Many of the wishes were poignant, many were sweet, many were heartbreaking, and a few were just fun.  I searched and searched until I found a tiny remnant of blue chalk and wrote a wish of my own.  Before I die, I want to write a book.

Write a book

I have never been a huge fan of the whole bucket list concept.  I am not sure why, but to me it just seems sad.  I would rather live in the moment.  But this public art project took the whole concept of a bucket list and made it into something I found inspiring and incredibly moving.  If you live in the Pittsburgh area, I really encourage you to do some explorations and find this building.  If you live somewhere else, go exploring.  And do a little reflecting about what you want to accomplish during your time on Earth.

Let go, Be free, Be alive

See all the photos I took here.  Also see a video about the project here.

Sunday, February 24, 2013

Review: Magic BB Cream from L'Oreal

I recently had an opportunity to try the new Magic BB Cream from L'Oreal.  I started wearing makeup in junior high school, and back then the prevailing mentality was that if you were going to wear makeup, you needed to wear foundation to protect your skin.  Beauty products have changed a lot over the years, mostly for the better, and now, we have options regarding what type of coverage we want.  Because my skin has an uneven tone and color, I most often still opt for a light foundation.  It just helps me get a more even look.  However, because my skin is so dry, it almost always looks like I am wearing makeup.  I am never able to achieve that dewy, fresh faced look.  This product really appealed to me, in the hopes that I could finally get that look.

Magic BB Cream says it primes, perfects, hydrates, and corrects.  Sadly, I found it lacking in all those areas.  If something is a primer, to me, that says it can be worn under regular foundation.  However, when I tried this, my makeup looked very thick and caked on.  I only used a small amount of the Magic BB cream, as well as a small amount of foundation, but it still looked like I was wearing stage makeup, not a good look.  Since the product claims to hydrate, I also tried using it without first moisturizing my skin; once again, the results were disastrous.  My skin looked so dry, and the pigment in the Magic BB cream was concentrated on those areas of dry skin, so again, I looked like I was wearing a lot of makeup, despite the fact that this is a minimal coverage products.

I found that the best way for me to use this product is by first moisturizing my skin as I normally would, then using Magic BB cream in place of foundation.  However, those claims to perfect and correct were also a let down to me, so I need to use spot corrector and undereye concealer, as well as powder.  And the results?  Well, they look the same as when I wear foundation.  The big difference is I feel like I am not wearing makeup at all.  And that is certainly a plus.

I think one of the reasons I ran into so many problems is that I chose the wrong color of Magic BB cream.  I have fair skin; I always use a fair foundation and the lightest concealer.  So, it stood to reason that I would need the lightest shade of Magic BB cream.  When I opened it to use it, however, the cream is nearly white. It is very light, and I think that is the reason it fails to even my skin tone and cover up imperfections.  While this is no fault of the product itself, consumers to need to be aware how very light (white really) the shade is in order to properly match their skin tones.

In summary, I think this product has a lot of potential for some women, but I just do not think it was a great match for me.  I think L'Oreal foundation is probably better suited to my coverage needs than the Magic BB Cream.

Note: I received a complimentary product courtesy of  SheSpeaks and L'OrĂ©al for review purposes.  All opinions are honest and original.

Sunday, February 10, 2013

It's Always Sunny in Kittanning

Always Sunny in KittanningHubby and I are huge fans of the show "It's Always Sunny in Philadelphia".  We fully acknowledge that it is a show full of really screwed up humor, but man oh man, is it funny.  Over the holidays, we watched the entire series, every episode up to date.  This is probably the third or fourth time we have done this since we the days where we were just dating.  We often quote the show, and sing the songs from "The Nightman Cometh" episode.  So, yeah, we kind of love the show.  Which makes the fact that the following situation took place not at all surprising.

We are redecorating our living room (more on that to come in future posts), and we are in the painting phase right now.  Yesterday, we taped the room, and I spent a lot of time spackling holes and other flaws.  Today we moved on to the paint itself.  While painting, Hubby says to me "Where is Charlie when you need him?".  I knew immediately, he was referring to Charlie Kelly, a character in "It's Always Sunny in Philadelphia" who always get's stuck with the grunt work. After Hubby posed that rhetorical question, the following exchange occurred:

Me: Yeah, this is totally Charlie work.
Hubby: Most definitely Charlie work.
Me: Though, to be fair, would you really want Charlie painting our house?  Who knows what it would end up looking like.
Hubby:  At least there would be no rats.

Now, you really need to be a fan of the show to appreciate the awesomeness of this conversation.  But to those that are fans, doesn't this conversation absolutely make sense?  We could totally be on that show.